
Notice
Recent Posts
Recent Comments
Link
| 일 | 월 | 화 | 수 | 목 | 금 | 토 |
|---|---|---|---|---|---|---|
| 1 | ||||||
| 2 | 3 | 4 | 5 | 6 | 7 | 8 |
| 9 | 10 | 11 | 12 | 13 | 14 | 15 |
| 16 | 17 | 18 | 19 | 20 | 21 | 22 |
| 23 | 24 | 25 | 26 | 27 | 28 | 29 |
| 30 |
Tags
- uitableviewdiffabledatasource
- JSON
- Firebase Analytics
- ribs
- swift
- combinecocoa
- Tuist
- observable
- 카카오뱅크 ios
- Subscribe
- 네트워크 통신
- Swift Tuist
- arc
- xcode
- ios database
- Combine
- realm
- GCD
- KeyPath
- Subject
- ios
- swift database
- swift db
- Firebase
- swift 5.9
- RxSwift
- swift 6
- SeSAC
- Tuist Swift
- SwiftUI
Archives
- Today
- Total
천원의 개발
IOS TableView 커스텀 본문
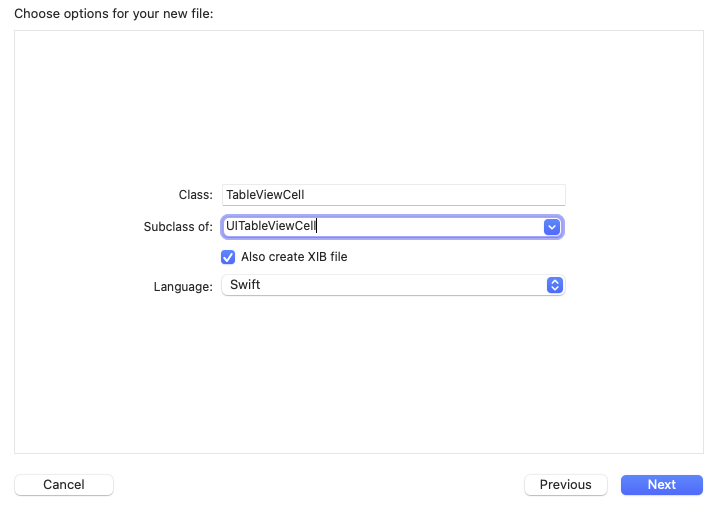
먼저 XIB를 체크하고 새로운 파일을 생성한다
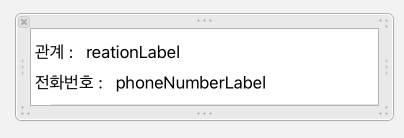
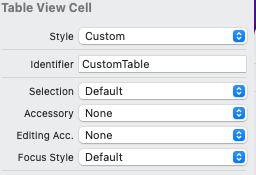
그후 만들어진 XIB파일을 커스텀한다 커스텀한 table에 identifier설정해주고 나는 CustomTable이라고 설정했다
자 이제 TableViewcontroller로 가서
class TableViewController: UITableViewController {
@IBOutlet var tableVIew: UITableView!
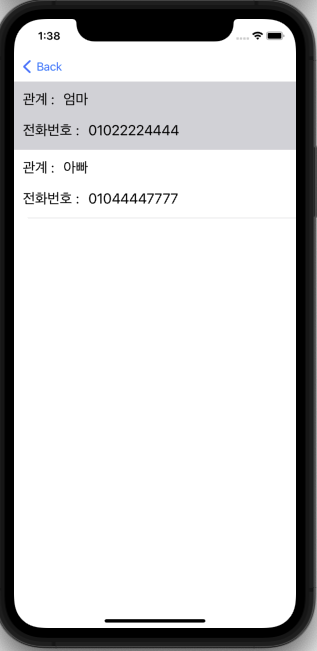
var contact: [Contact] = [
Contact(relationship: "엄마", number: "01022224444"),
Contact(relationship: "아빠", number: "01044447777")
]
override func viewDidLoad() {
super.viewDidLoad()
tableView.register(UINib(nibName: "TableViewCell", bundle: nil), forCellReuseIdentifier: "CustomTable")
}
// MARK: - Table view data source
override func tableView(_ tableView: UITableView, cellForRowAt indexPath: IndexPath) -> UITableViewCell {
let cell = tableView.dequeueReusableCell(withIdentifier: "CustomTable", for: indexPath) as! TableViewCell //
cell.reationLabel.text = contact[indexPath.row].relationship
cell.phoneNumberLabel.text = String(contact[indexPath.row].number)
return cell
}
override func tableView(_ tableView: UITableView, numberOfRowsInSection section: Int) -> Int {
// #warning Incomplete implementation, return the number of rows
return contact.count
}
}요로코롬 추가 해주면 완성!
'iOS&Swift🍎' 카테고리의 다른 글
| IOS Firebase에서 데이터 가져오기 (0) | 2022.04.04 |
|---|---|
| IOS Firebase에 데이터 추가 하기 (0) | 2022.04.02 |
| IOS TableView 초기설정 (0) | 2022.03.30 |
| IOS Firebase를 활용한 로그인 화면 구현 (0) | 2022.03.29 |
| IOS Firebase를 활용하여 회원가입 구현 (0) | 2022.03.29 |